Cats and Christmas trees do not mix. Whether they’re knocking baubles on the floor or scaling the branches, cats seem to love the smell of pine and the natural allure of the tree bark. While it might seem like they also love nothing more than causing trouble, your cat is only doing what instinct demands by climbing, exploring, and playing.
In their world, you have brought a giant scratching post indoors for them to play with. It’s cute when it’s a cat in somebody else’s tree, but it’s a nuisance and an annoyance when you have to pick up the tree, reassemble the decorations, and listen for a clink that might suggest the cat is hitting the ornaments again.
The obvious solution is to forego the tree altogether. However, alternatives are available for those of you who still want to enjoy the trappings of Christmas without the nightmare of marshaling the cats.
The 10 Christmas Tree Alternatives
Instead of a Christmas tree, you could choose an alternative to the traditional one that looks great but that your cat won’t find as appealing.
Consider one of these 10 alternatives to the traditional Christmas tree.
1. Tabletop Tree

Strictly speaking, a tabletop tree might not alleviate all of the destruction your cat causes, depending on the type you pick. You can get natural and artificial trees that are small enough to sit on a tabletop.
Your cat will want to know what this latest addition is, but they won’t be as inquisitive because it is less robust than a full 6-foot Pine. Moreover, if your cat pulls down a 2-foot tree, it will be much easier to put it back up and redecorate it. It’s not ideal, but a solution.
Small artificial trees can incorporate fiber optics, giving the tree light and ornamental value. You should watch your cat around the trees because eating them can cause electrocution.
2. Wooden Tree

We know that all trees, strictly speaking, are wooden, but the wooden tree we’re referring to here is made from a series of wooden slats.
The wooden slat tree is an excellent piece of festive art that makes a statement without having to add intricate lights and decorative baubles. It is also much stronger and more resilient to inquisitive cat behavior. However, your cat may want to scratch at the wooden slats to leave their mark because they are ideal for scratching and keeping claws in tip-top shape.
They also provide a kind of ladder for your cat, and she is sure to find it more appealing than the climbing post you bought, but there are benefits to this style of tree. The wooden tree is heavy and should be impossible for your cat to knock over.
It won’t become easily damaged when your cat climbs it, either. It might smell oil from the wood, but it doesn’t have dried-out pine needles or tree sap to keep your cat away from. There are also tabletop versions, as well as full-size variants.
3. Christmas Tree Shelf

The Christmas tree shelf is ideal for cat owners and takes up very little space. Because it hangs on the wall, it doesn’t take up any floor space. The shelving unit is shaped like a Christmas tree and hangs several feet off the floor.
You can decorate it by hanging lights around the frame and adding a splash of color with vinyl covering. To make it look more like a traditional Christmas tree, arrange the tree shelf with plants and other greenery.
If your cat is prone to scratching through gift wrapping, you can use a deep shelving unit and put the presents right on the shelf. It keeps them ordered, will prevent all but the most agile of cats from getting to them, and looks very Christmassy.
If your cat likes to sit on shelves, she will probably try to sit on your new Christmas shelves, too.
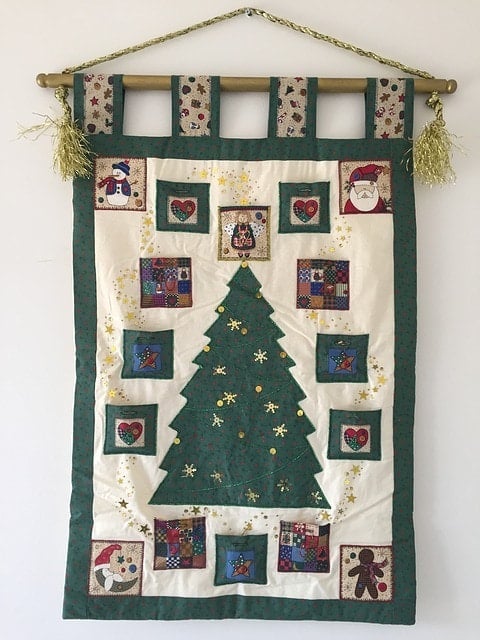
4. Wall Hanging Ornament Tree

There are a few variations to this tree, but the principle of a wall-hanging ornament tree is that it hangs from a hook in the wall, so it only protrudes a few inches out. Ornaments can be attached to the tree, and if you hang it high enough, it will deter your cat from using it as a scratching post.
However, the design may appeal to climbing cats. It is essentially a ladder, and this problem is intensified if you place gifts under the ornament. They provide a leg up to reach the tree branches.
5. Ceiling Hanging Ornament Tree
The suspended Christmas tree is usually made from a decorative collection of baubles or other decorations that signify a traditional tree. Hanging an actual tree from the ceiling is not a good idea and will likely cause more of a disaster than letting cats get inside the branches of a Pine tree.
Low-hanging trees might be tempting for your cats. They will probably want to bat the lowest-hanging ornaments around. If you hang the tree higher, it can deter your playful pets from doing that or encourage them to perform gravity-defying leaps to get hold of the bottom baubles. You know your cat best, so only you know which is the best option.
6. Upside Down Tree

In 12th-century Europe, hanging the Christmas tree from the ceiling upside down was traditional. You must ensure that the tree is fully secured to the ceiling and that the fastenings you use will not break or detach.
You should also be prepared for some cats attempting to jump into and climb the tree, but most will sit and stare at it, presumably in amazement at the effort it took to put it up there.
It is best to hang the tree in the corner of the room, otherwise, you will be evoking another ancient tradition akin to dancing around the maypole whenever you enter the room.
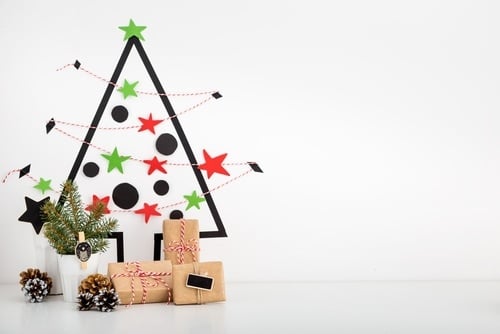
7. Christmas Tree Wall Decals

Decals are vinyl stickers, and they are often used as a quick and relatively simple means of adding a motif or other design to a plain and boring wall. They come in various shapes, sizes, and designs, including festive designs.
It is possible to get whole festive scenes that evoke images of a winter wonderland, incorporate Santa and all of his reindeer, and that can fill an entire wall. Alternatively, you can keep it relatively simple with a Christmas tree design.
The decal looks realistic, and if you avoid crinkles or bubbles, it will look good on the wall. If you want to add lights, you can clip or fasten them to the wall, giving the traditional appearance of Christmas tree lights and a more three-dimensional texture.
Moreover, your cats will have little to no interest in the decal. Do they scratch new wallpaper after you’ve redecorated?
8. Christmas Tree Wall Art

Decals can look great, but if you want something with a little more artistic flair that looks spectacular, consider full wall art. Canvas prints are surprisingly inexpensive. They can include a lifelike and lifesize image of a Christmas tree with all the decorations you would typically add to your tree.
The canvas gives a texture to the image that lifts it off the flat surface and provides a greater sense of realism than a flat vinyl decal. Also, you don’t have to buy a single rectangular canvas. Triptych and other multi-panel designs can give a real sense of flair and individualism.
They will catch the eye and act as a real conversation starter when visitors are around, and your cats won’t want to scratch, climb, or mark them.
9. Christmas Tree Ladder

The basic Christmas tree shape is one of a triangle, and this shape can be easily replicated using something as simple as a set of step ladders. We suggest using wooden ladders rather than metal or aluminum, but the latter could be used to create a modern take on the traditional festive design.
Open the ladder up, hang your lights and ornaments, and there will be plenty of room under your tree to put the presents. The obvious problem with a ladder tree is that you create several platforms for your cat can perch, but there’s less danger of them eating the needles or drinking the tree water.
10. Christmas Tree Scratch Post
If you’re concerned with your cat scratching away the bark from your Christmas tree, potentially knocking it over and ruining the Christmas illusion, why not combine the features of a Christmas tree and a scratching post in one?
We’re not suggesting that this should replace a tree, but by providing a new scratching post for your cat, you could deter them from turning your festive pride and joy into a shredded pile of bark, needles, ornaments, and gifts.
Alternatively, if you want to surprise your cat with something cool, check out the Hepper Hi-Lo Cat Scratcher. It's not just a scratcher; it's a piece of modern furniture that your cat can play on. It's got a curvy design that's perfect for stretching and moving, and it's built tough with strong birch plywood and thick B-flute cardboard. You can adjust it to three different heights, which keeps cats entertained. Plus, it won't break the bank! Our cats love it, and we do too.
At Catster, we’ve admired Hepper for many years, and decided to take a controlling ownership interest, so that we could benefit from the outstanding designs of this cool cat company!

Why Do Cats Love Christmas Trees?
Cats love to climb and scratch interesting materials. They also love to explore anything new. Bringing a tree into their territory plays on all of those intuitive reactions. They can climb the branches, and they are fascinated by the shiny balls that hang off the ends of the branches. This activity might seem like they’re out to make your life miserable, but it’s all intuitive.
Cats scratch for a host of reasons. Their claws grow in layers, and scratching helps shed the old layers as new ones replace them. Scratching also helps with marking territory. Along with the visual marking of scratches, cats have scent glands in the pads of their paws. As they scratch, it leaves a pheromone behind that calms them and lets other cats know of their presence.
Your cat is a highly inquisitive animal, and when you put a tree up in the house, feline nature dictates that she must investigate. Cats investigate by looking, smelling, scratching, and prodding. Hence, your beautifully and painstakingly decorated tree becomes little more than bare branches and a pile of baubles.
As natural and adorable as some of this activity is, it can quickly become very irritating. What’s more, it can be dangerous for your cat. Avoid tinsel because it can cause a bowel obstruction. Ribbons can cause similar issues. Even lights could cause problems for your cat, especially if you have one that is especially prone to chewing and clawing.

Final Thoughts
Christmas is supposed to be a joyous and happy time of year, but cat owners know the pain of having to decorate and continuously redecorate a destroyed tree. By considering the alternatives above, you can alleviate this concern, so all you have to worry about is whether the cats are peeing behind the presents and tearing away the layers of wrapping. It’s a good thing we love them.
Related Read:
Featured Image Credit: thehrhpaul, Pixabay


