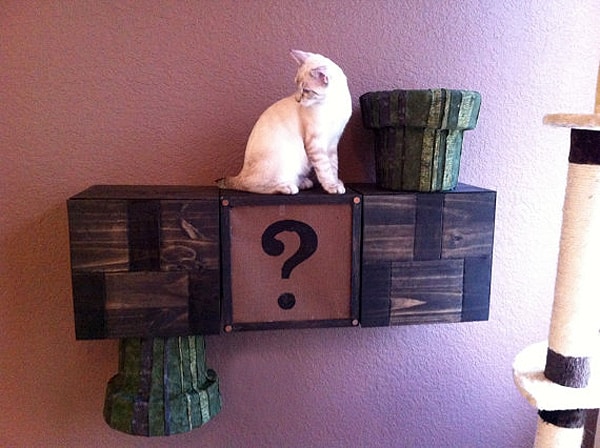
Anyone who has a cat should be very familiar with the beige scratching posts and climbing structures sold at your average pet store. These climbing structures may be easily accessible, but they are often not great to look at. Very few cat trees are stylish, and many are blatantly un-stylish.
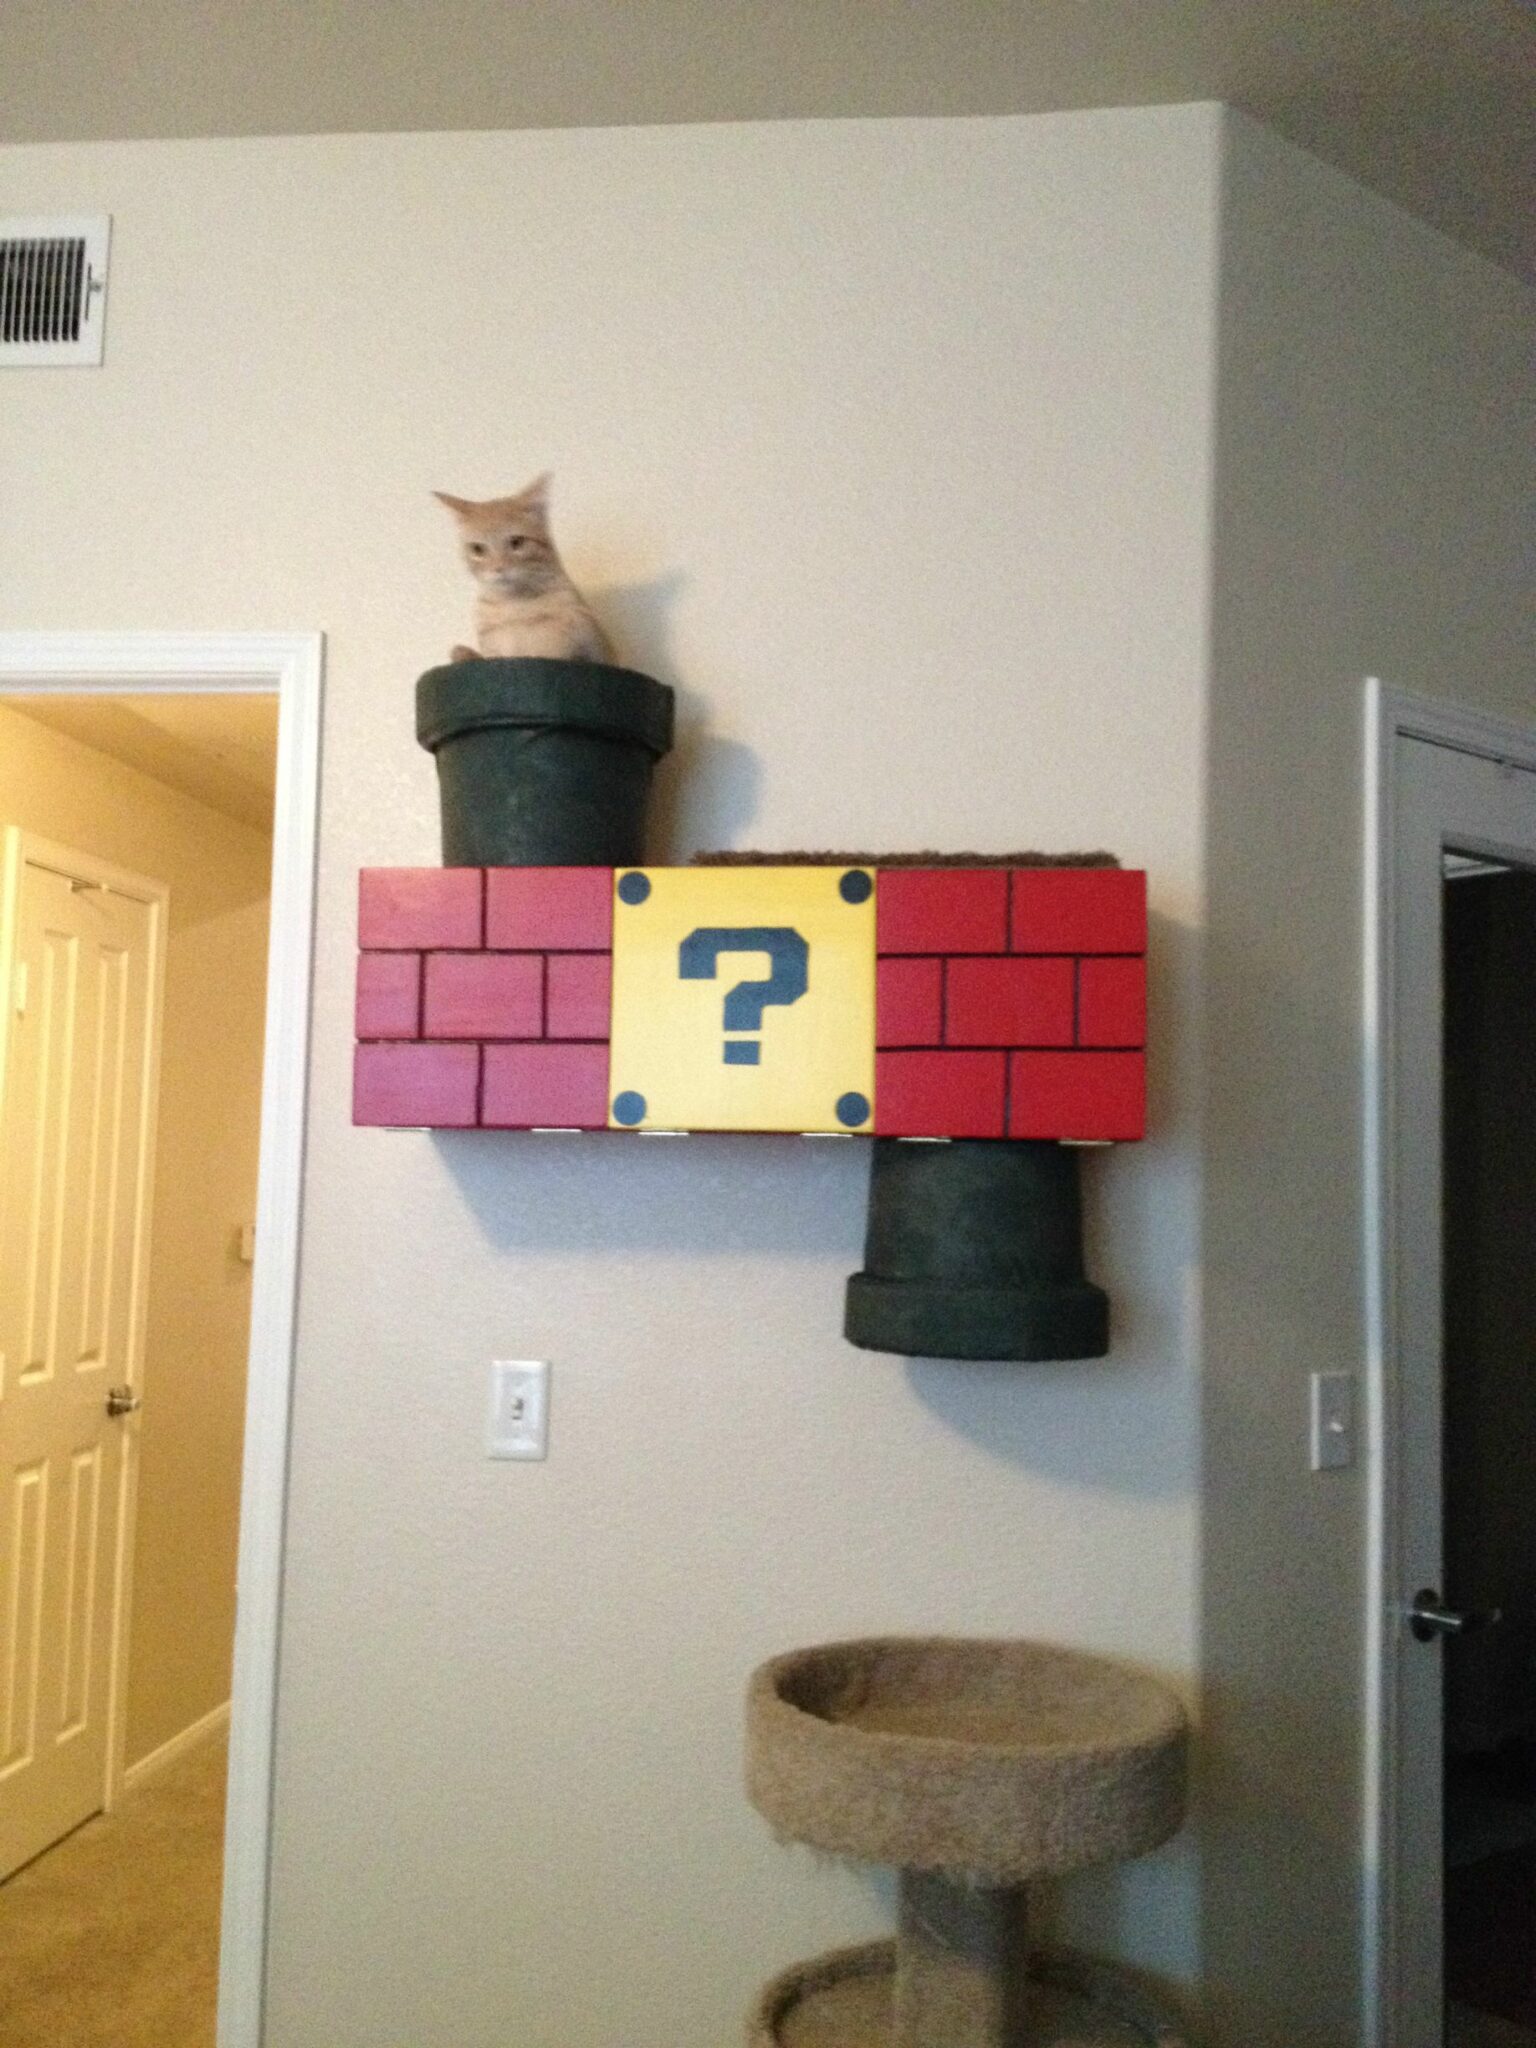
Luckily, DIYing your own cat tree isn’t challenging. In this article, we’ll go over how to build your own Super Mario-themed cat tree in just a few simple steps.
The Step-By-Step Guide on How to Make a Super Mario Themed Cat Tree
1. Collect Your Wood
You’ll need several pieces of wood for this project. Choose something lightweight, as you will be hanging it. However, it should also be stiff enough for your cat. You can adjust the dimensions as necessary based on the size of your cat and how many you have.
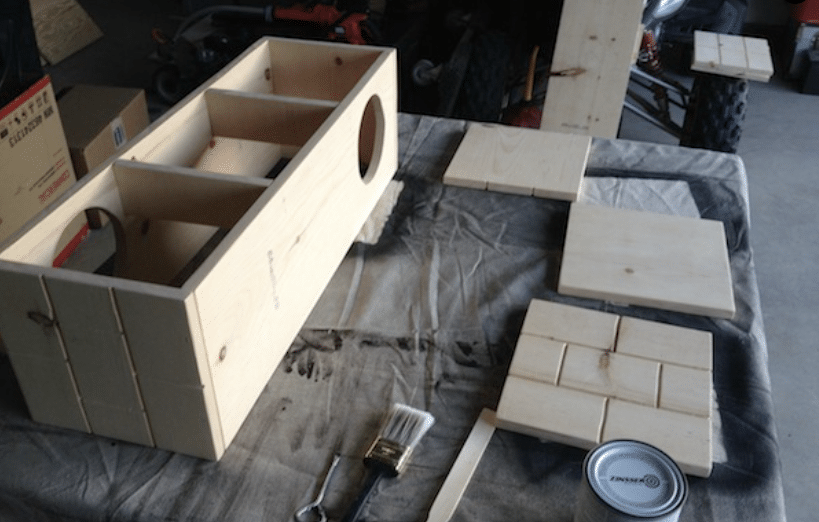
You’ll need three longer pieces that represent the full length of your box. You’ll also need five smaller pieces that are about three times smaller than the longer ones. These will go on the sides to give the rectangle depth. If your cat is big, you may need to make it bigger so that your cat can fit. The exact measurements will depend on your unique situation.
2. Cut the Holes
Two of the longer pieces will need a circular hole cut into them. One should be left alone, as it will be the base of the box. You can have this done at the store where you purchase them, or you can do it at home if you have the right equipment.
The holes should be on the far side of the rectangular piece, not in the middle. Your cat will need to move through these holes, so be sure that they’re big enough for your feline. Leave enough room from the edge to ensure durability, though.
3. Start Assembly
Lay the longer piece that doesn’t have any circular holes cut into it. This will be the base of the rectangular box. Next, screw two shorter side pieces to either end. Finally, add another longer piece along the back (this one should have a hole). Now, you should have a rectangular box with two sides missing.
4. Add the Other Side
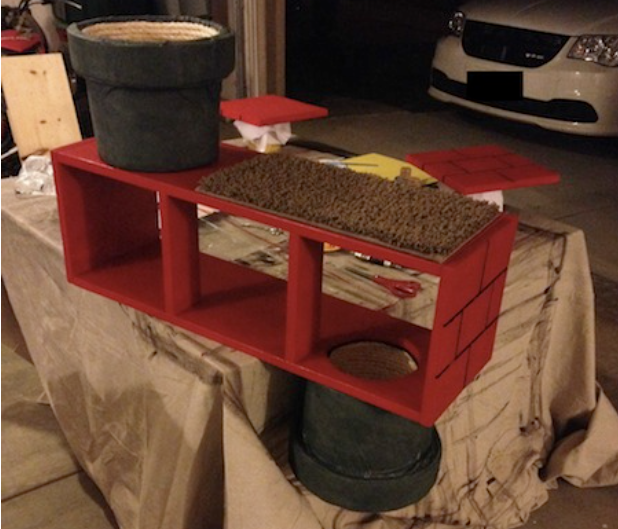
Now, you need to add the last rectangular piece. This should be rather straightforward. However, you should ensure your holes are on opposite sides of the box. You don’t want them directly facing each other. Make sure to flip the rectangular piece around so that it’s on the opposite side before you screw it in.
Finally, you can add two of the smaller pieces to the top of the box. One piece should go over the left side, while the other should go on the right. There should be an empty space in the middle.
5. Painting
Now, it’s time to start painting! You can decorate the box however you wish, of course. However, the original plan features a brick-like design to make it look like a Super Mario brick piece. You can paint it however you’d like. Just be sure to use cat-safe paint.
And no, we aren’t done putting stuff on. It’s just easier to paint the main portion of the box now before we get everything on it.
6. Tubes
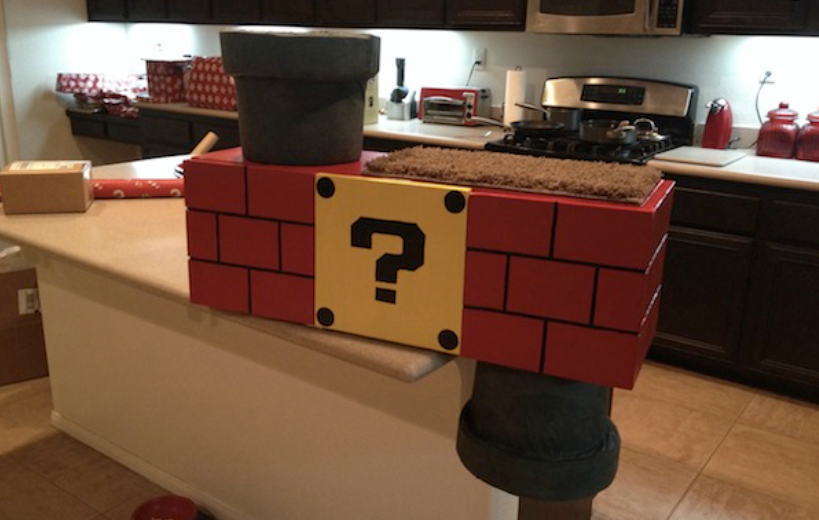
Now, it’s time to make the tubes that Mario travels through. You can use big pieces of PVC pipe for this. However, these can be a bit harder to find. You may have to special order them, though your local hardware store may have them. It’s much easier to use pre-made tubes than trying to make your own.
To give the tube the appearance of having a thicker top (like you see in the Super Mario games), You’ll need to fit a larger wooden piece around the top. You can also use rubber or even more PVC pipe. The only requirement is that it’s solid and safe for your feline. Glue this around one end of each pipe (you’ll need two).
Finally, paint the whole thing green!
Add carpet or a similar fabric to the inside of the tube for your cat to lay on. Preferably, choose a green color, but any color will do if you can’t find something you like. Many people choose to put a sisal for their cat to scratch on instead, and this works fine, as well.
7. Paint the Surprise Block
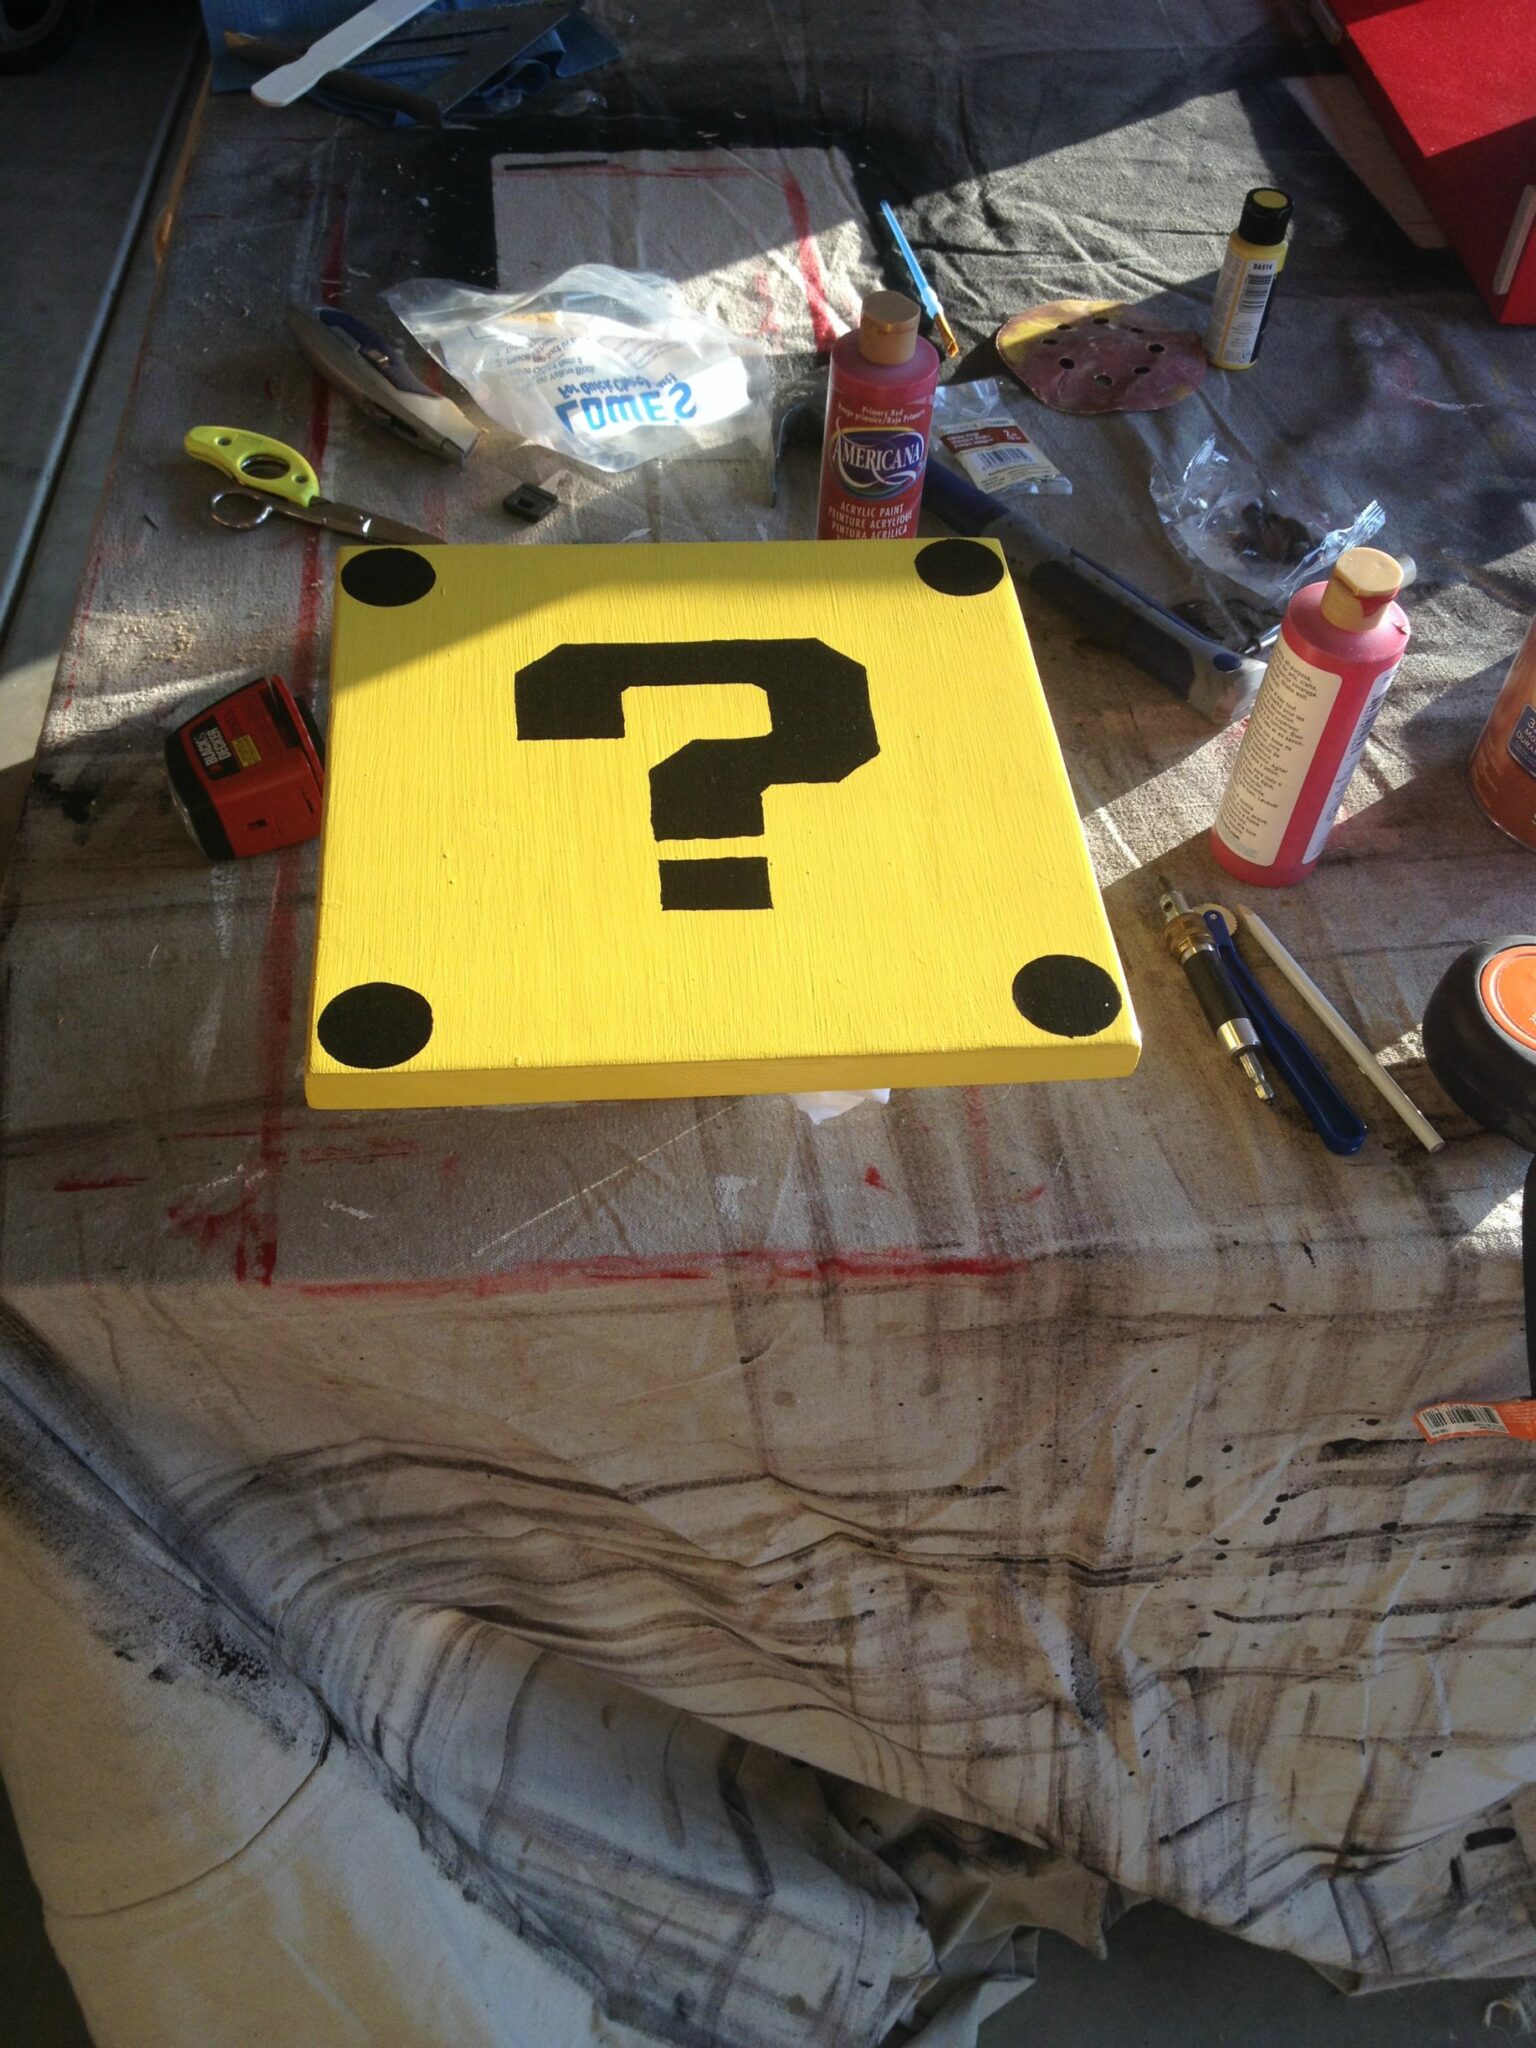
Take one of the small, square pieces that aren’t attached to the box and paint it to look like a surprise block. This requires a lot of tape and patience, as it’s one of the more intricate designs you’ll be painting. That said, it doesn’t have to be perfect!
It’s much easier to paint this piece before you attach it. So, be sure you’re happy with it before you move on.
8. Attach the Surprise Block
Next, you can attach the surprise block to the empty space on the top of your box. We recommend using hinges so that you can remove your cat from inside the tree if necessary. Otherwise, the only entrances are through the tubes. Hinges can be a lifesaver.
9. Attach the Tubes
Finally, attach the tubes to the holes you cut earlier. You can glue or screw them in, depending on the materials you use. Either way, the box will pretty much be done after you complete this step!
Final Thoughts
Making this scratching post is more work than just picking one up from the store. However, this one is much more unique, and you can adjust it to work with your specific feline. Adjusting the sizing and adding toys is pretty straightforward.
Featured Image Credit: WesWoodward, Imgur

